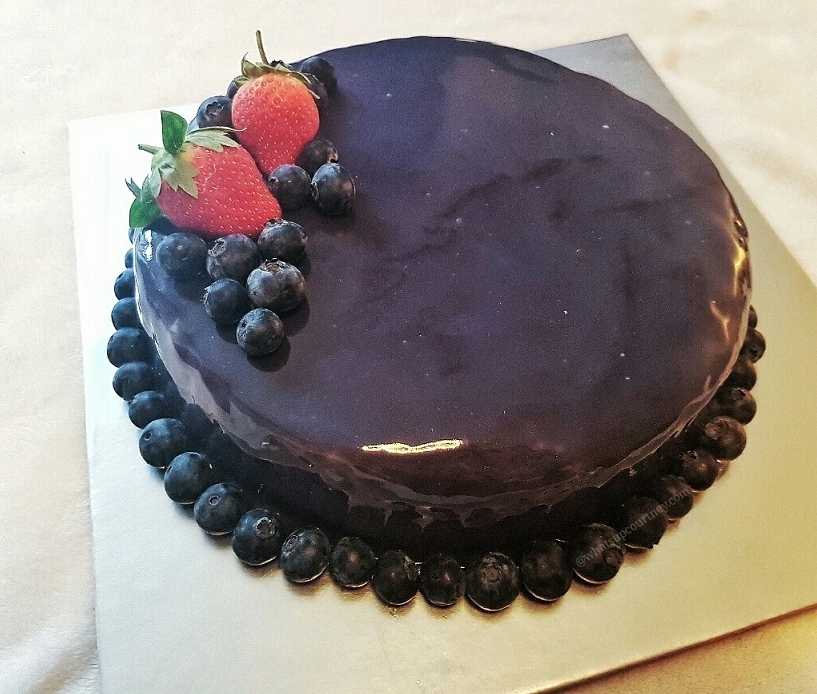
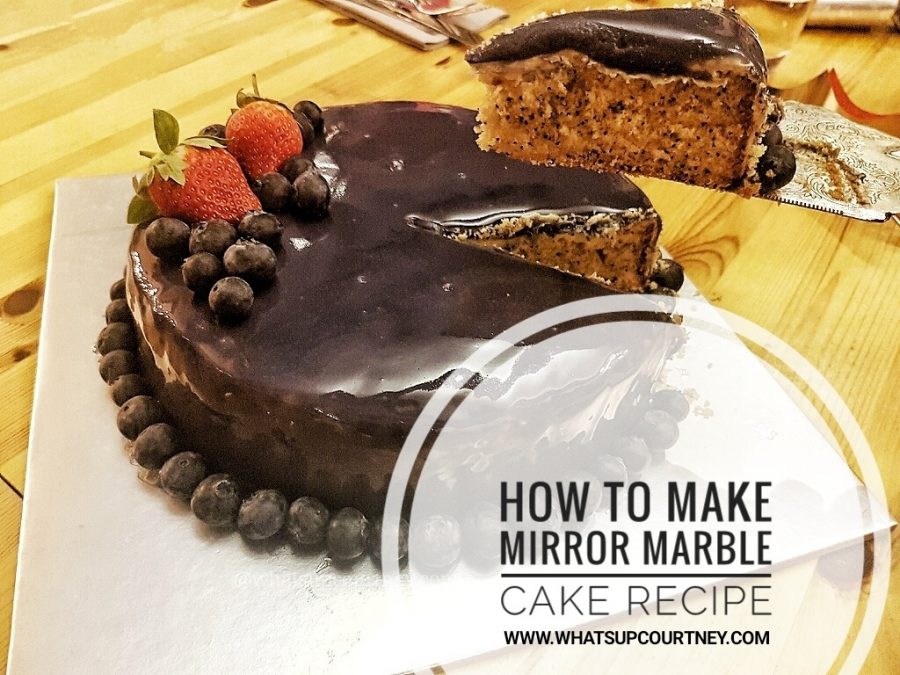
This was a decorating experiment that turned out, oh, so satisfying.
The minute after I poured the glaze over the cake, and saw myself in the reflection, I knew I just had to share the recipe with you.
It was my friend, we shall call her Limes, birthday recently, and her boyfriend asked me to arrange a cake! I was super excited.
I knew her favourite cake is lemon and poppy seed but the question is how the heck am I to decorate a relatively simple cake hmmm…?!
Went on Pinterest and Instagram for inspiration and found this amazing Russian baker, Olga Noskova on Instagram and her cakes are simply beautiful, very minimalistic but incredibly professional.
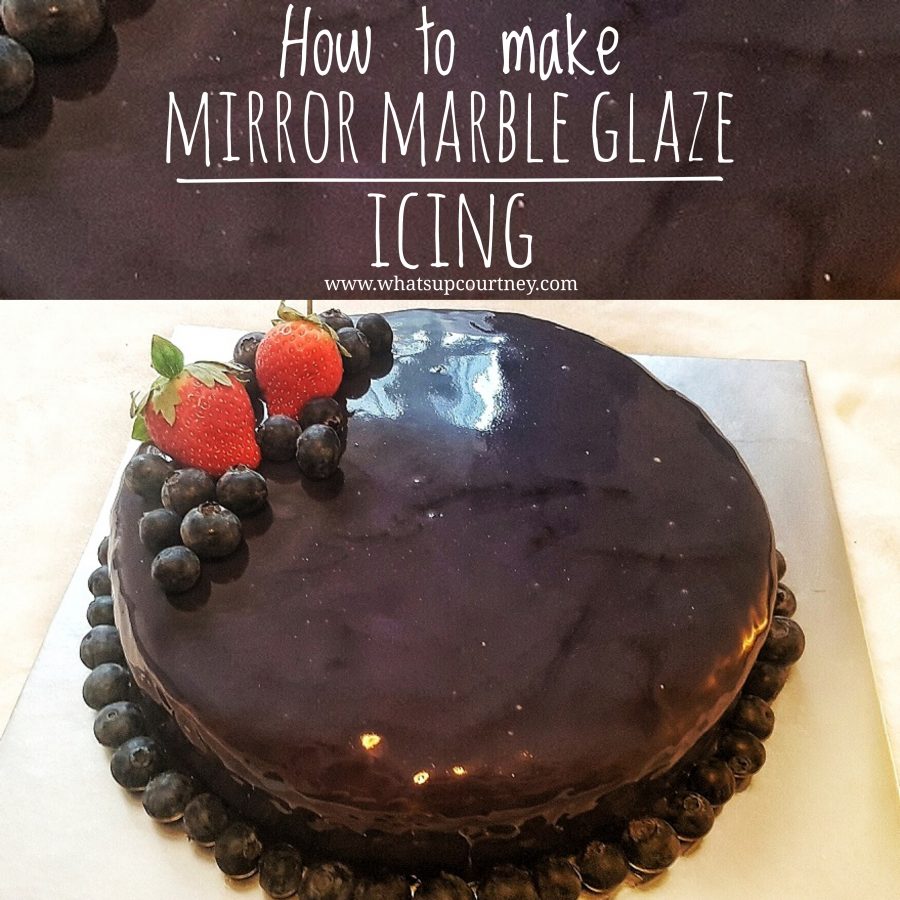
It’s called a mirror glaze.
Found a recipe online and after a few sessions on Youtube to see how it’s done, it looks straightforward.
Let’s give it a try, shall we?
I used this recipe (found this on Boredpanda article on mirror cake)
Ingredients:
20 g Gelatin Powder
120 g Water
300 g Liquid Glucose
300 g Sugar (I used Castor)
150 g Water
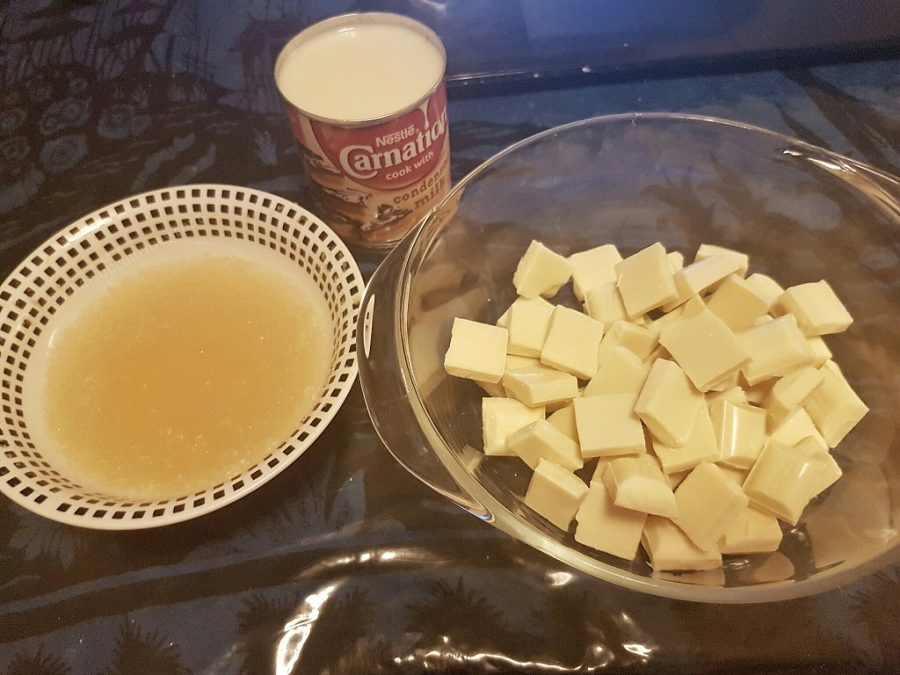
200 g Sweetened Condense Milk
300 g Chocolate (White, Milk, Dark or a combination)
Food Colouring
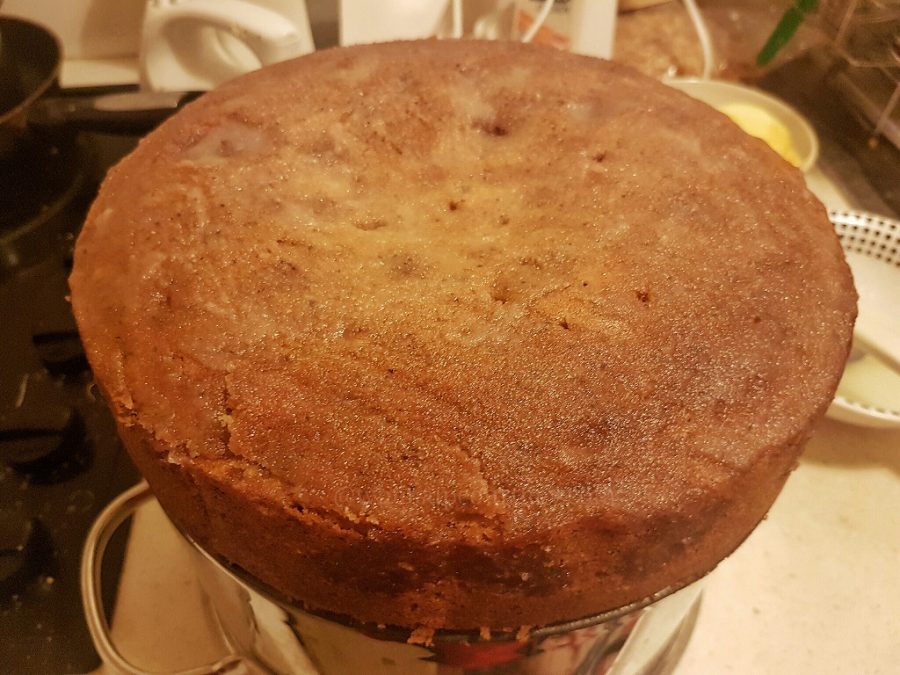
First up! Make the lemon and poppy seed cake. Used a simple Mary Berry’s recipe .
Always let the cake cool down first before putting any icing over it.
I literally started baking the night before the birthday lunch, so I used good ol Betty crocker icing to ice the cake. It is a good idea if you are in a rush but the trick about this glaze – you have to make the surface as smooth and flat as possible to get the effect, and I find Betty’s icing really thick.
And I’m no pro at this haha but you have just got to make the best of it.

The more you handle the icing, the sticky it gets so pop it into the fridge for 15 mins and let it harden up. Then before you pour the glaze over, you can press down any uneven surfaces (if there are any).
OR
You can make a white chocolate mousse and pour it over the cake while in the tin, and let it set overnight.
For the icing
Mix the 20g gelatin powder and 120g water in a bowl and let it harden up (leave it till you use it later).
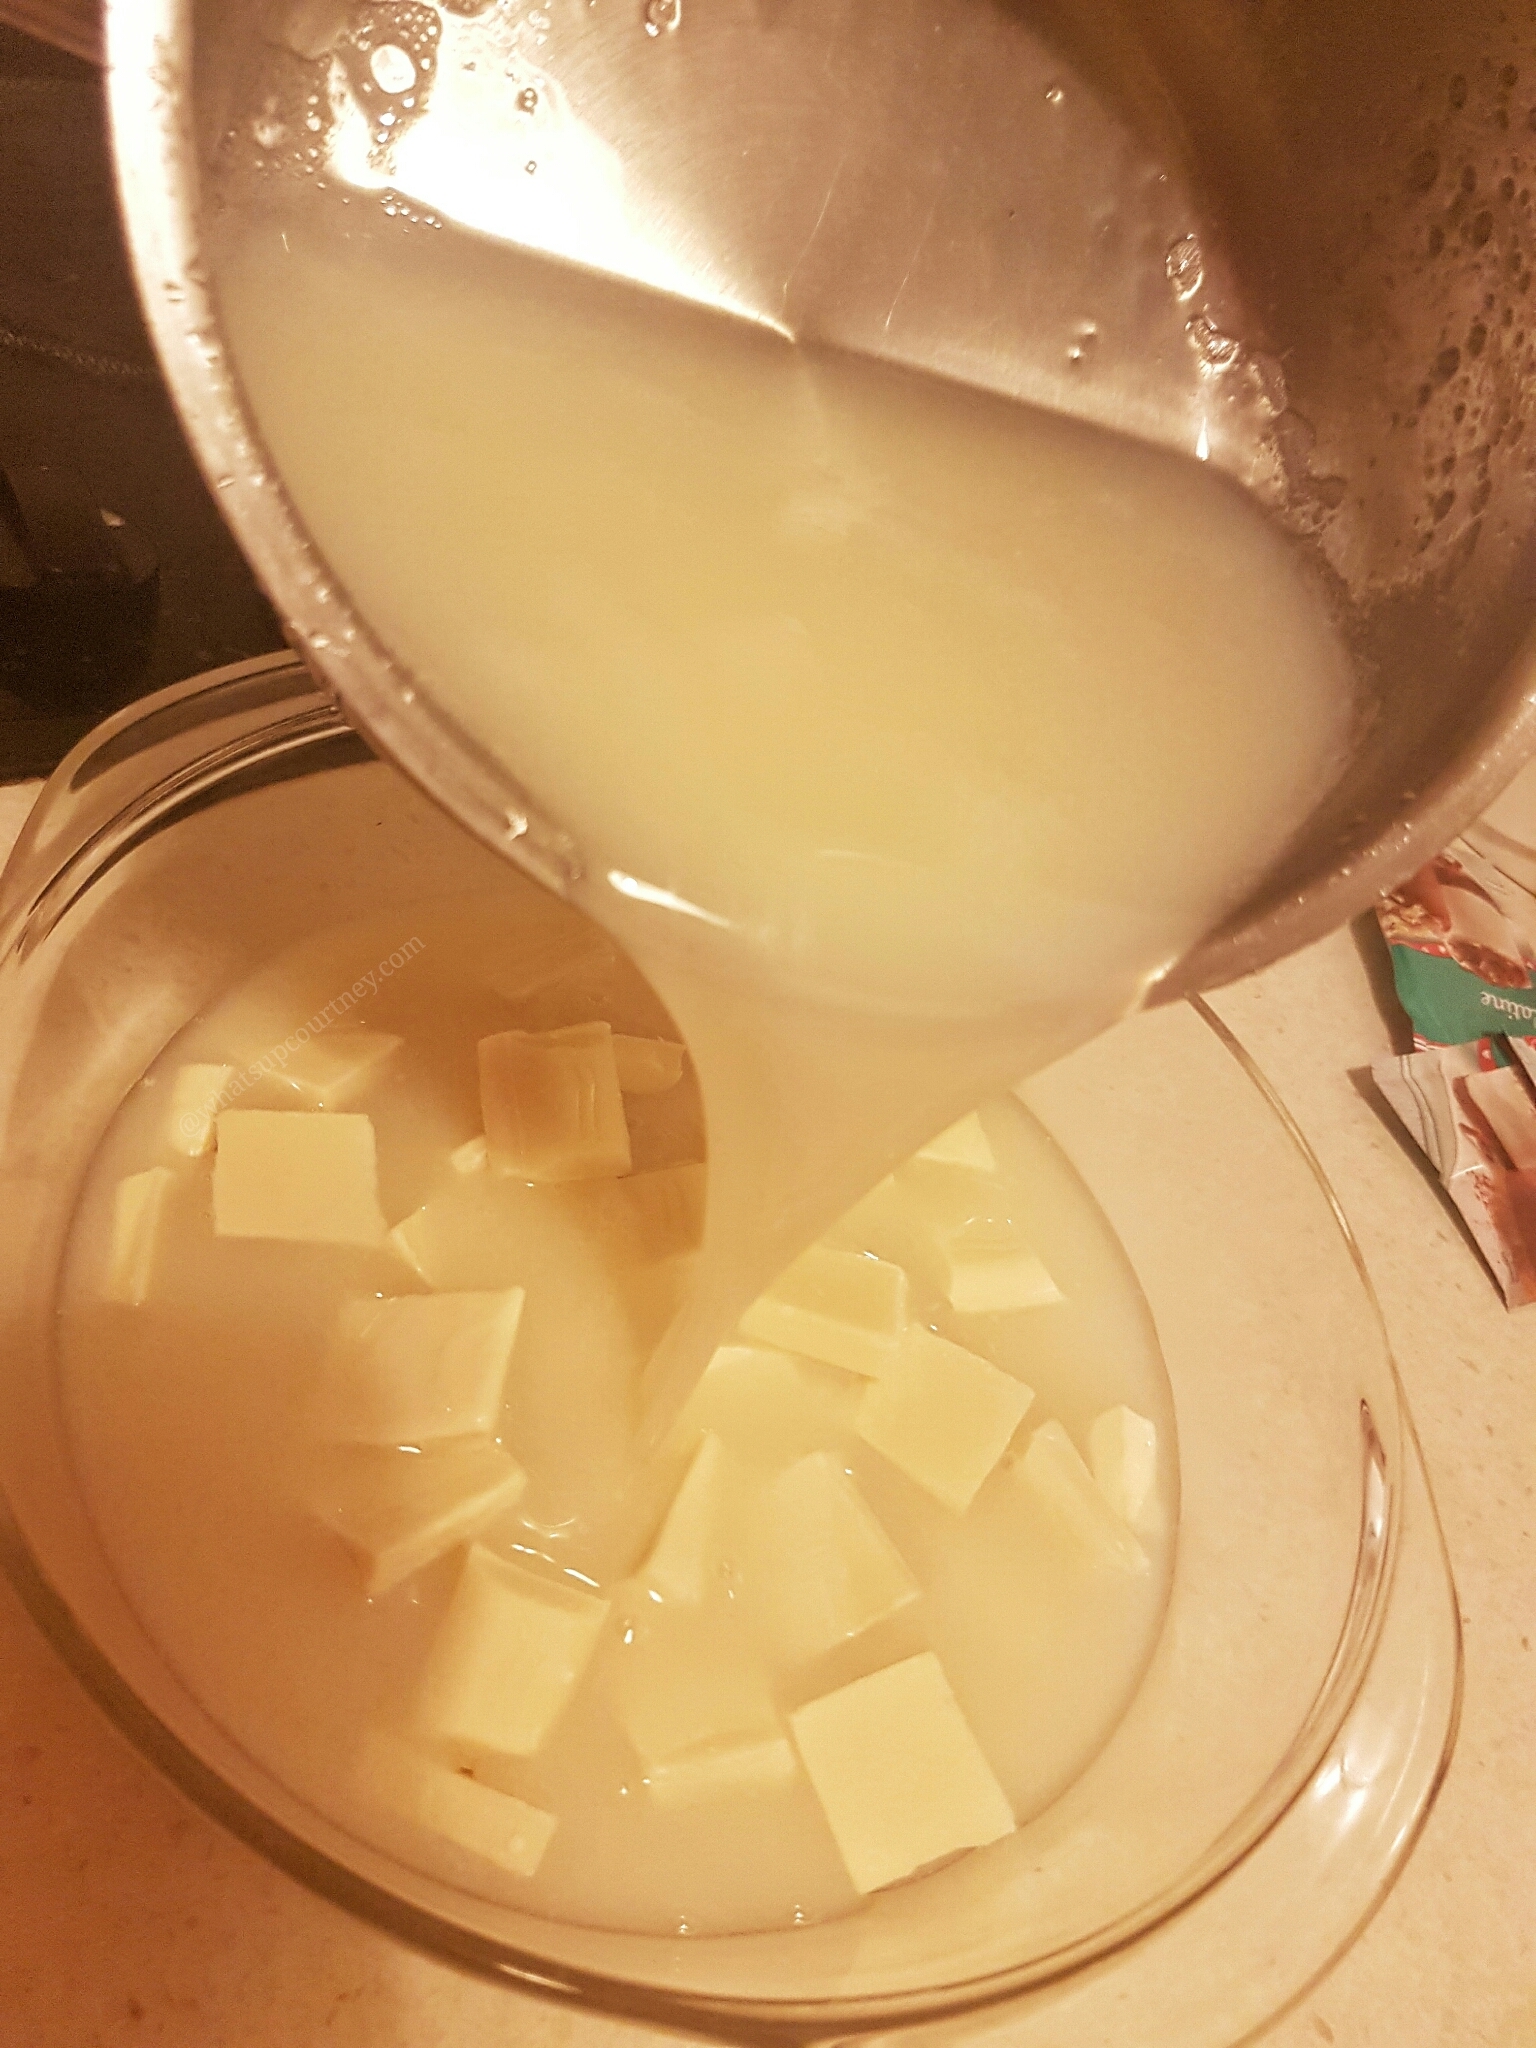
I’m using white chocolate with Blue and black colouring later. Break up the white chocolate into pieces in a large bowl.
Break up the white chocolate into pieces in a large bowl.
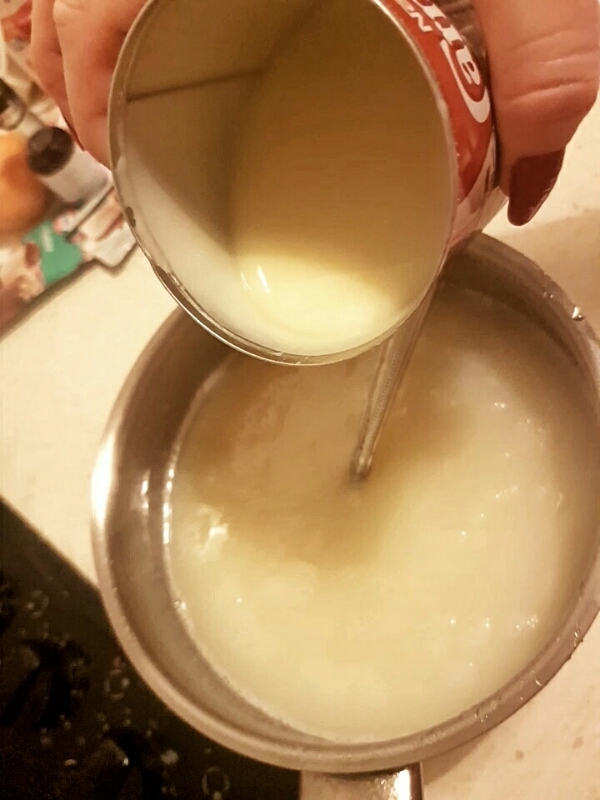
Boil the glucose, sugar and water in a pan (stir once or twice) and let it bubble up.
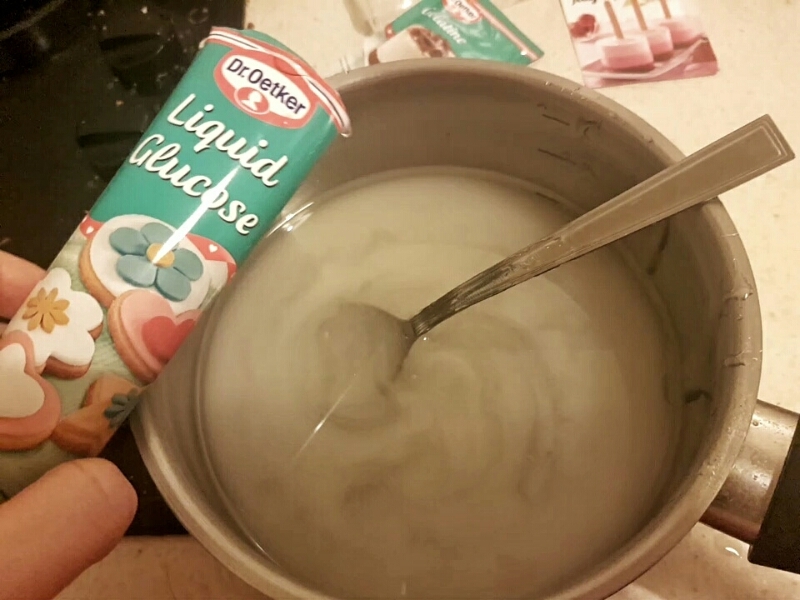
Remove from heat and add the gelatin which should be hard and jelly-like now into the pan and mix it.

Add the condensed milk into the mixture and stir.
Pour the mixture into the white chocolate bowl (be careful it is hot!), and mix it all up letting all the chocolate melt.
Use a kitchen aid to blend the mixture together.
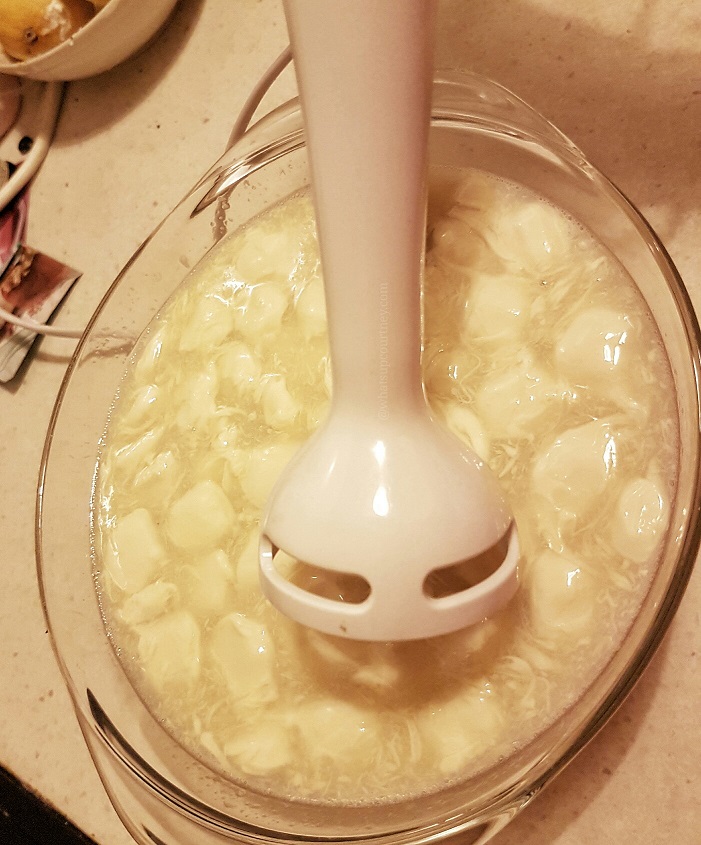
Sieve the mixture into a separate bowl. We want this mixture to be as smooth as possible with minimal air bubbles, preferable none.

Add in your food colouring, I used the non gel version cause that’s what I had but I find it is better to use gel cause it is thicker and you don’t use a lot of it.
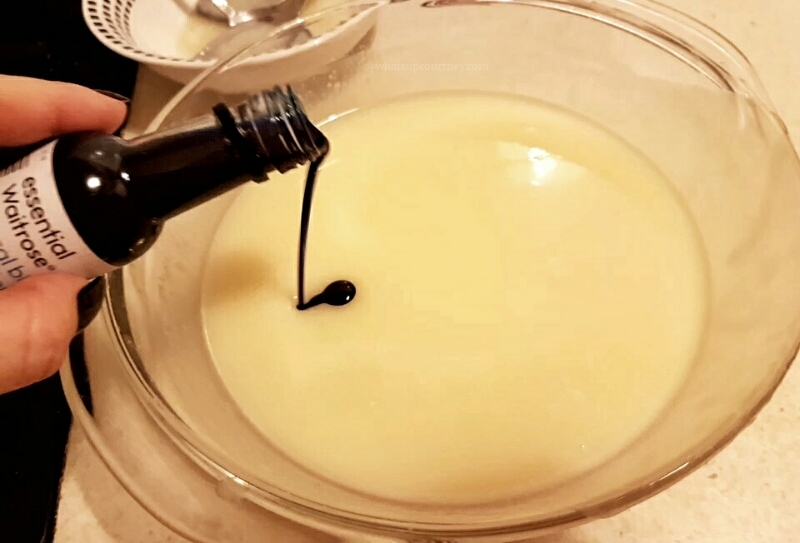
I’m after a swirly look, so I separated the mixture into 2 bowls, add a blue colouring in one and black colouring in the other.
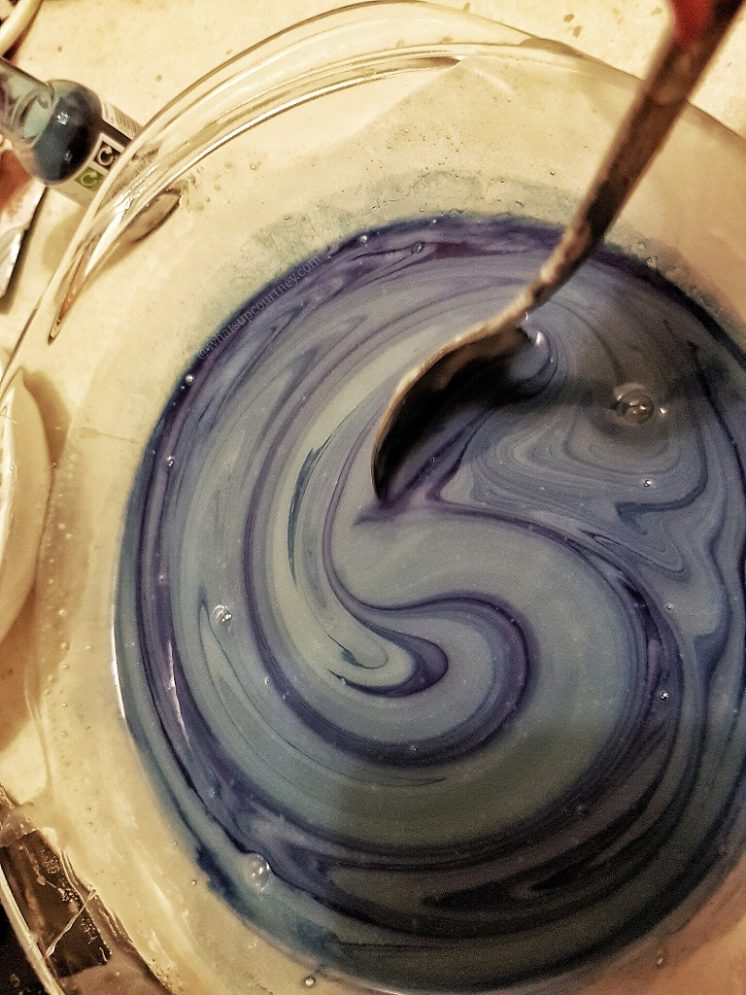
Let the icing cool down first before pouring, can take 10 minutes or so till the mixture becomes thick.
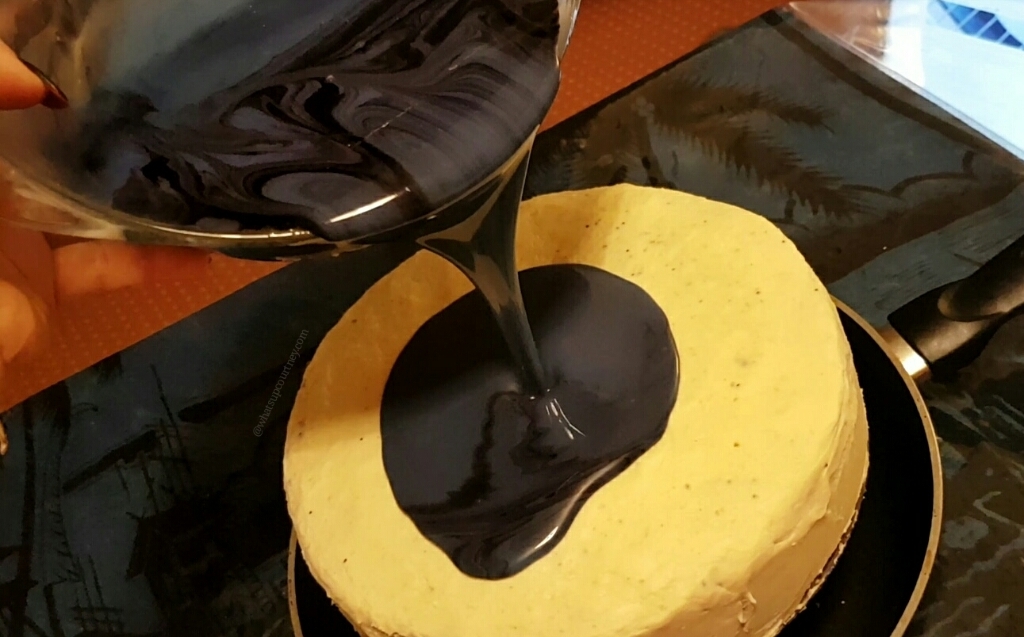
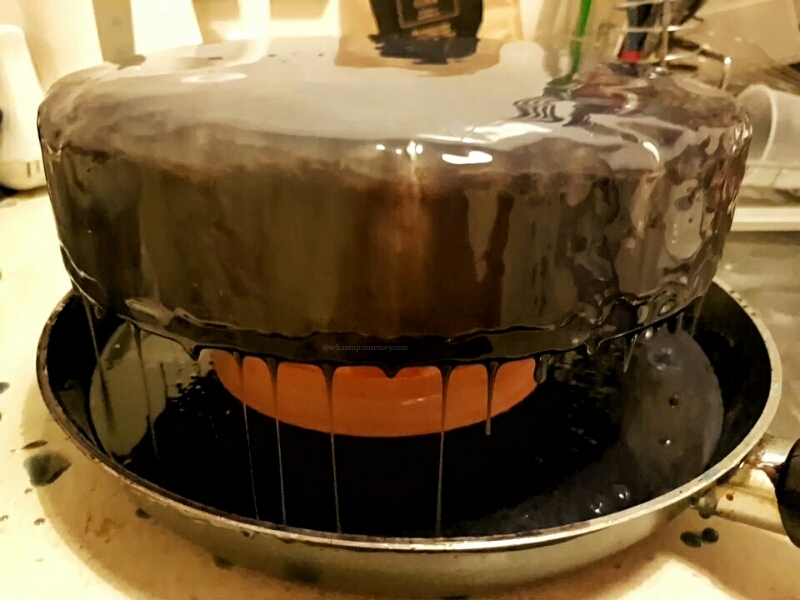
Take out your cake and prop it up using a bowl and a large saucepan underneath to cake the dripping icing. (If you have a wire rack, you can use that as well.
Just pour it down and watch the magic happens – watch the video here
It’s so satisfying!
Then pour the second coating with the black colouring.

Now now, no dipping in the icing, it’s hard to resist I know!
I collected the mixed coloured icing on the bottom of the pan whilst the cake is chilling in the fridge.
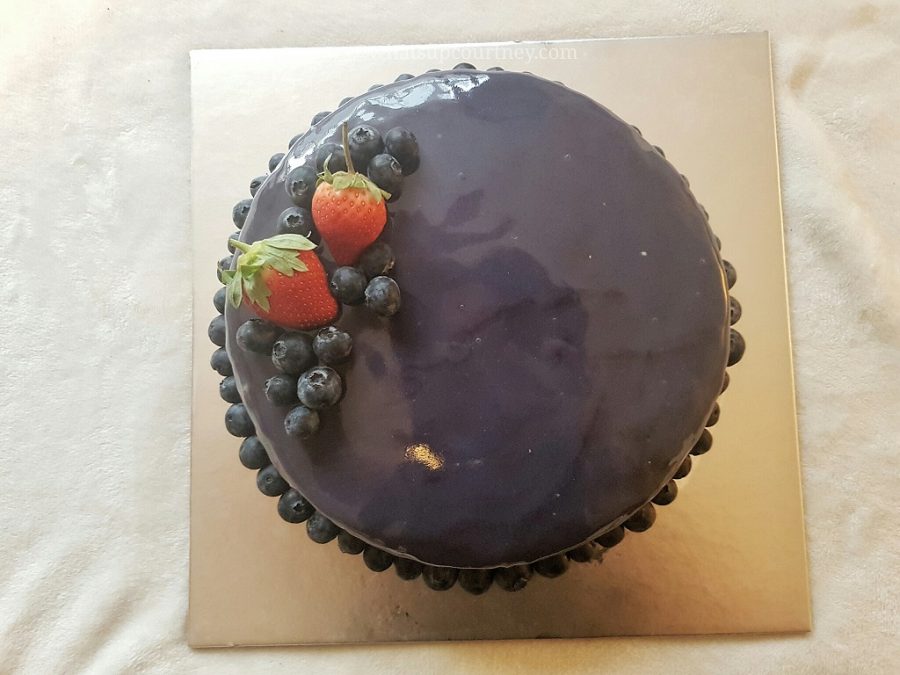
After 15 mins in the fridge, I poured the remaining icing over the hardened cake and let it set in the fridge overnight.
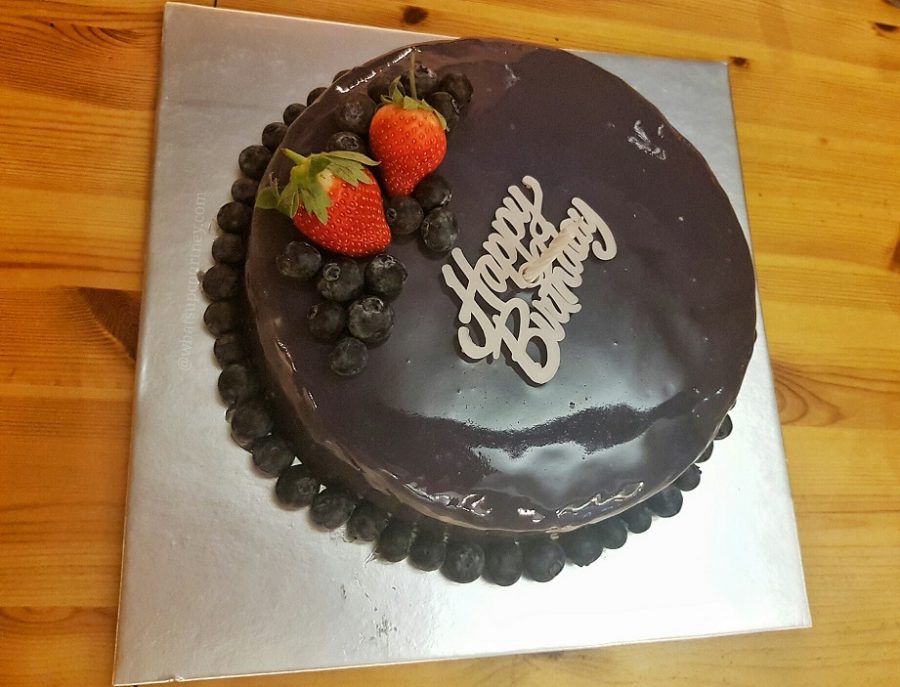
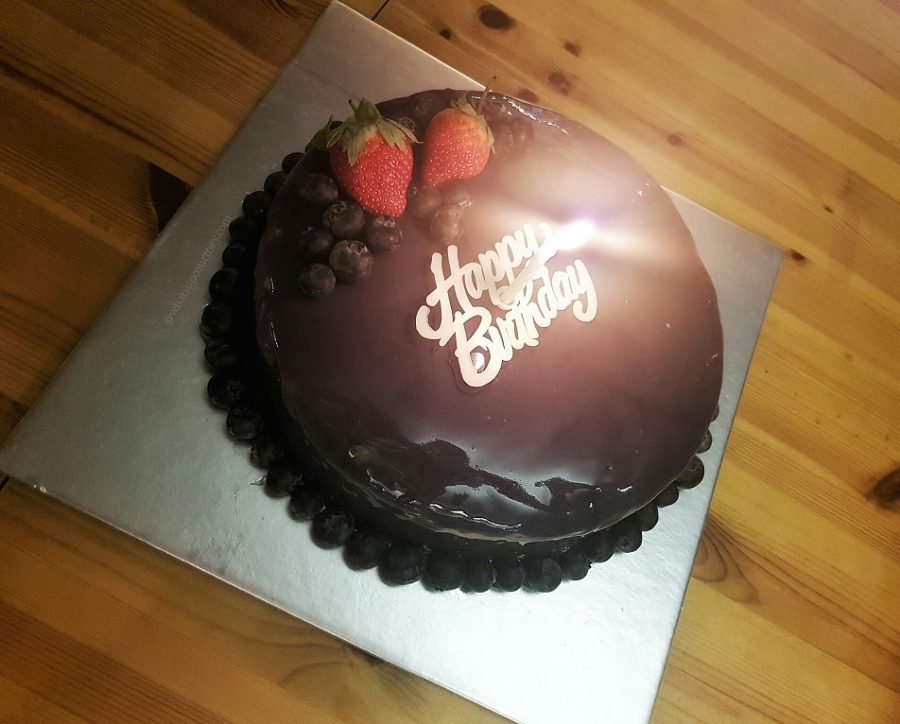
It turned out purple ‘blueberry’ colour! *yay*
Decorated with blueberries around the cake with a couple of strawberries for a pop of colour and voila!
Spot my reflection!
Although it is highly tempting to poke the cake hmm…
Gasp! Cake slightly sunk in the middle. No one tells Mary Berry please!! It’ll be our little secret k!
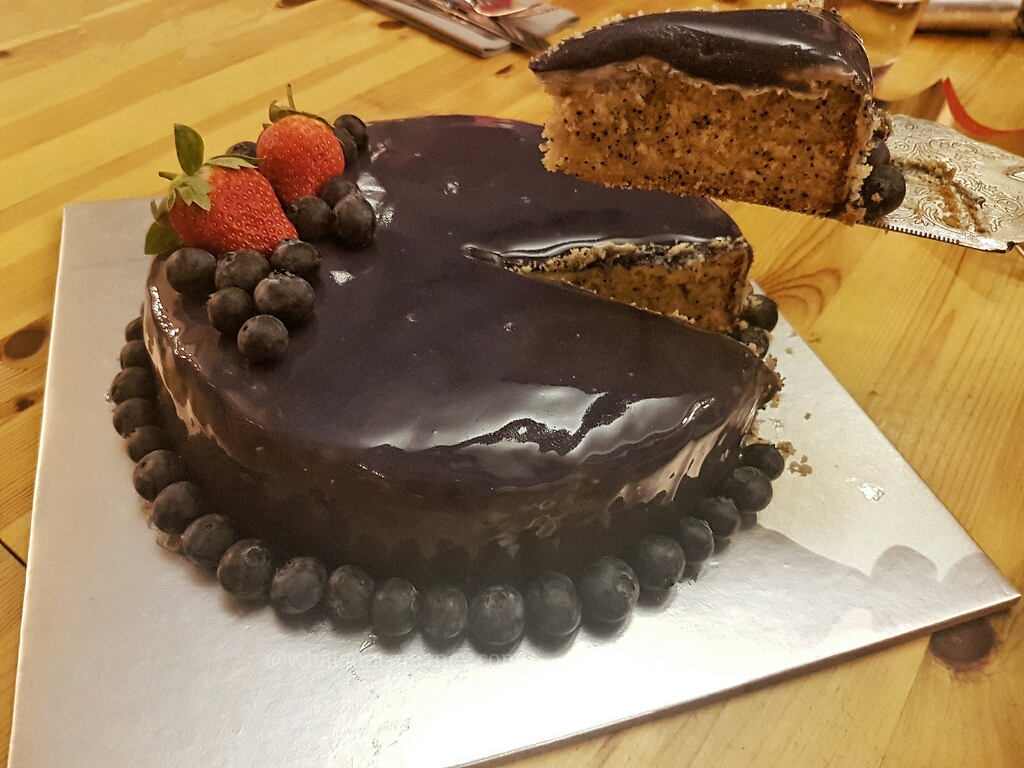
More importantly, the birthday girl loved it too!
Have you tried making this glaze? What colours or design have you done?
Courtney xx
I love reading your comments, they make my day! Love to hear from you if you want to ask me anything in particular or have a general chat or feedback. Thanks for visiting my blog, it’s highly appreciated! xx
Add me: Twitter | Facebook | Bloglovin | Pinterest | Instagram: heywhatsupcourtney
PIN IT: HOW TO MAKE A MIRROR GLAZE
Leave a Reply